
Showing posts with label Fried Food. Show all posts
Showing posts with label Fried Food. Show all posts
Monday, 9 July 2012
Jalapeño Fritters | Molagai Bajji
Friday, 6 July 2012
Paneer Pasanda

Tuesday, 27 March 2012
Medu Vadai | Black Gram Dumpling | *200th Post*
This happens to be my 200th post on Edible Entertainment! :-) And this is one of my most favorite recipes in the world...
Medu Vadai. (pronounced as May-dhooo V-uh-dye) is a traditional favorite of south Indian, especially Tamil cuisine and is an indispensable part of the menu on festivals. ‘Medu’ means soft, and the dumplings must live up to the name. This is the basic version of the fried snack. There are so many different varieties possible with the same batter.

Medu Vadai. (pronounced as May-dhooo V-uh-dye) is a traditional favorite of south Indian, especially Tamil cuisine and is an indispensable part of the menu on festivals. ‘Medu’ means soft, and the dumplings must live up to the name. This is the basic version of the fried snack. There are so many different varieties possible with the same batter.

Wednesday, 9 November 2011
Low-Fat Aaloo Bonda | Batata Vada | Stuffed Potato Dumpling

Before I proceed, here's some background about what we're making today. Typically, Batata Vada | Aaloo Bonda (read like Rhonda ;-)) involves DEEP-FRYING a potato-filling (& other veggies) dipped in gram flour batter. Here's something you may (or may not) have seen before -

This is called a Kuzhi Paniyaram Achchu (don't even try pronouncing it! Only south Indians will get it right :-D) As you can see, it has holes (or kuzhi) in which we pour any batter and make small ball shaped snacks. SO this is what we're using today, to make these low-fat dumplings. If you don't have this, you can always deep fry & then burn off on the treadmill! :-P
Tuesday, 18 October 2011
Mixture | Assorted Savories in a Chili based garnish | Diwali special

It is the month of one of the most important festivals of India - DIWALI (Deepavali, Devali etc.) We Indians celebrate the festival with great pomp and show. New clothes, bonus cheques, sweets and savories that can bring any dieting-guru to their knees! (This day can single-handedly account for the entire pollution of India! Say NO to fire-crackers! Adopt a green Diwali! ☺)
If I have to get into the history of Diwali, then one post wouldn't be enough. There are multiple stories as to why we celebrate this festival. But like every other festival, this signifies the triumph of good over evil. There are different versions of the story in different parts of India. You can read about it here.
So, that brings us to what's cooking in my kitchen! ☻ In every house, at least 1 sweet & 1 savory is made during this time of the year. Now, being from a typical TamBrahm (a cool name for the Tamil Brahmins) family, I couldn't try out snacks that would make my kollu-paatis & thaathaas (great grandparents) turn in their graves! (uhh.. Okay, I'm pretty sure they were burnt & not buried. :-| Well, You get what I wanna say, right? :-P) (read: Waffles, Muffins, Cookies & anything that doesn't have the typical *u* attached to its name: like murukku, manankombu etc. - only people familiar with the south-Indian languages can get this) Am I getting carried away by the TamBrahm stuff again? I'm sorry! :-D
Well, let's just say that as usual, I bowed down to my Amma's (mother) wish and made (or rather, assisted!) something which we've been making for every Diwali so far : Mixture. It is just the name for a savory in which we make various snacks and then mix them all up & garnish them. I’m finally posting the recipe for which I posted the previous 3 posts (Boondi, Oma Podi & Maida Biscuit) for… There are no hard & fast rules for this one. Just get the snacks you love & mix them up! :-P Well, it is a little more than just mixing. Read on.
I’m mixing the following goodies to make this yummy mixture:-
§ Boondi
§ Oma Podi
§ Fried Cornflakes
§ Fried Rice Flakes
§ Fried Peanuts
§ Fried Curry Leaves

You’ve got to give the mixture a good dry garnish. Otherwise, it just tastes simple. The garnish that we’ve used is straight from my Kumbakonam Kollu Paati’s Kitchen! (My great grandmom’s place ☻) This recipe has been used by very many generations and each time, it is a success. In fact, this time, it came out even better than the store-bought kind! I even heard a lady who came to our house for Golu ask “Where did you buy it from?” :-D So, you can be sure that this recipe can never go wrong! We made every single thing in the recipe from scratch. But if you cant or don’t want to, you can go ahead and just buy them from any Indian store!
What you need – (to make 12 cups)
Maida Biscuits – 1 cup (click on the link for the recipe)
Cornflakes – 1 cup
Rice Flakes / Thin Poha – 1 cup
Peanuts – 1 cup
Curry leaves – ½ cup
Salt – to taste (2 tablespoons) [[don’t use too much salt as the savories already have salt]]
Red Dried Chilies – 2
Oil – for garnish & deep fry
** You can make/buy all these the previous day**
Method –
1) Make the Boondi.
2) Add into a large vessel / mixing bowl

3) Make the Oma Podi | Sev
4) Add into the mixing bowl. Use your hands to crush the oma podi to get small vermicelli (sprinkle) shaped snack.

5) Make the Maida Biscuit
6) Add into the mixing vessel & mix well.


7) Fry peanuts well for about 1-2 minutes.
8) Add to the mixing bowl & mix well.


9) Fry the cornflakes for about 10 -2-seconds. Make sure you don’t over-fry them. Remove on a paper.


10) Add to the mixing vessel & give it a good mix.

11) Fry/Dry Roast the Rice Flakes / Poha. Remove on a paper


12) Add to the mixing vessel & mix.

13) Fry curry leaves.

14) Add to the mixing vessel.

For the Garnish -
1) Heat 2 teaspoons oil & fry the chilis well.


2) In a blender, grind it to a coarse powder.


3) Add Salt & mix.

Getting it together –
1) Add the garnish to the mixing vessel.

2) Mix well
* Since we made large quantities, we had to lay a paper on the ground, put the entire mixture on the floor & mix it thoroughly. But if you are making less, you can directly mix it in the vessel.

3) Serve!

%%%%%%%%%%%%%%%%%%%%%%%%%%%%%%%%%%%%

Monday, 17 October 2011
Diamond Shaped Mini Biscuit / Shankarpala

You need –
Refined Flour / All purpose flour / Maida – 1 cup
Powdered Sugar – ½ cup
Oil – 5 tablespoons for the dough + to deep fry
Water – 5-6 tablspoons
Method –
STEP 1: In a mixing bowl, mix the flour & powdered sugar well.

STEP 2: Heat 5 tbsp oil in a pan. When it is steaming hot, pour it into your flour.


STEP 3: Using a fork or a spoon, incorporate all the flour & the oil. (Don’t touch coz the oil is piping hot!)
STEP 4: Slowly, add water 1 spoon by 1 spoon. Using your hands, knead it to a soft dough.
STEP 5: Make sure you give a lot of pressure & knead the dough well. Let it rest for half an hour.

STEP 6: Heat oil in a pan
STEP 7: Take the dough, divide it into 2 big balls.

STEP 8: Using a rolling pin, roll out each ball of dough into a flat disk.
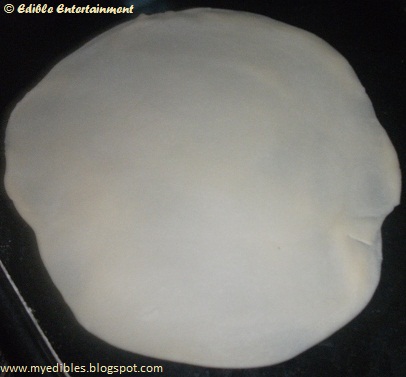
STEP 9: Take a knife & cut the dough into thin horizontal stripes.

STEP 10: Now cut them vertically to give you small diamond shapes. Slowly, remove them from the surface & keep them in a bowl to fry. Repeat with the rest of the dough.


STEP 11: When the oil is hot enough, add all the diamonds to the oil. You will see them instantly come up (indicates that oil is hot enough ☺)

STEP 12: Fry well on both side until they turn light brown & crisp. (Takes about 4-5minutes)

You cute mini biscuits are ready! I used them for my Mixture. But they taste awesome on their own too!
Enjoy!
################################################

Sunday, 16 October 2011
OMA PODI | SEV | Gram flour noodles
Every Diwali, Oma Podi (Oh-muh Poh-dee) is a must. I remember my Paati (Grandmom) used to make close to 2 kilograms of Oma-Podi!! It took her 4-5 hours & she used to do it so patiently! I can’t see myself getting cooked in the kitchen for 4 hours! For me, cooking is fun as long as it doesn’t take too long. But since I made this with my Mom, it didn’t seem too hectic! My mom did all the hard-work whilst I ogled, tasted, corrected, pressed the Podi-maker & transferred the fried savory to the container! ;-) So, yes, Momma, if you ever read this post >> 50% credit to you! :-D

For making this, you need a Noodle-maker / Sev maker. It has several really tiny holes in the bottom. You can stuff any dough in it & press & you'll get thin long noodles. It looks like this -


Ingredients – (Makes around 4 cups)
Chickpea Flour / gram flour / Besan / Kadalai Maavu – 3 cups
Fine Rice Flour – 2 cups
Salt – to taste 2 tablespoons
Water – to knead 2 cups
Carom Seeds / Ajwain / Omam – ½ cup
Oil – for deep frying
** Here, cup can be taken to be around 150 grams. But whatever cup you are using, use the same for all ingredients so that it is proportionate
Method
1) Lay a newspaper on your kitchen table. It tends to get a bit messy!
2) Sift both the flours SEPARATELY.
3) In a large mixing bowl, take the Chickpea flour (besan) and Rice Flour & mix well.
4) Add the salt. You could add red chili powder too. But I skipped
5) In a blender / mixer, grind the carom seeds to fine powder. Then, mix them with warm water. After 2 minutes filter the carom-seeds water (run it through a sieve) to get the carom seeds flavored water. Pour this little by little into the flour mix. THIS IS WHAT WE USUALLY DO TO GET THE FLAVOR. YOU CAN SKIP IT & USE PLAIN WATER OR ANY OTHER FLAVORED WATER TOO.
6) Make a sticky dough >> not too liquidy (or it wont hold in the Sev-press) nor too thick (it will be difficult to press)


7) Heat enough oil for deep frying in a heavy bottomed pan.
8) Open the Sev Maker / Press / Achchu & stuff it with some dough.


9) Close & slowly start pressing it & move your hands in a circular motion within the pan like so –


10) Once you make enough to fry it the oil, simply break the link with your fingers.


11) Let it fry on one side for about 4-5 minutes & the other side for the same. Until it is slightly golden & crisp!


12) Remove in a tissue paper to absorb excess oil. Your Oma Podi is ready!

~~~~~~~~~~~~~~~~~~~~~~~~~~~~~~~~~~~~~

Subscribe to:
Posts (Atom)


