Ads 468x60px

Thursday 29 September 2011

Hara Bhara Kebab

Not that I am an important food celebrity or anything. But if anyone has been wondering why I haven’t posted in a while, here’s why – I haven’t been well for the past one week. Got the freaking Flu & Fever! I’m sick of being sick! And since I HAD to post a recipe today, I decided to do it inspite of the fever. Yep, I’m the brave Rani Lakshmibai :-P


Hara Bhara Kebabif I have to translate it literally, it means Green (Haraa); Stuffed (Bharaa); Patty (Kebab).
Most of you must have guessed that this dish has a leafy vegetable as its main ingredient. The two main ingredients are – Spinach and Potato. And you can make it with as little oil as you want (or as much!) I luuurrrvee both Spinach AND Potato. I used to be mesmerized by how Popeye got his strength by eating his can of Spinach! ;-) I have used only half a teaspoon of oil per kebab. And yes, it is healthy! With the leaves and potato, it is a perfect post-workout snack!


What you’ll need (Makes 4 big Kebabs or 8 mini kebabs)


1. Spinach – a bunch (around 25 leaves or more) [It may seem like a lot of quantity to make 4 kebabs. But when you blanch them, they reduce to 1/4 th of their size!]
2. Potato – 1 large or 2 medium
3. Peas – ½ cup boiled (I didn’t have peas so I skipped)
4. Saltas per your taste (around 1.5 teaspoons)
5. Green Chilis(optional) 2 – roughly chopped
6. Fresh coriander / cilantro leaves – a handful (around 4 tablespoons)
7. Mint Leaves / Pudina – 2-3 tablespoons (I just had different edible green leaves at home so I decided to use them. And they gave an amazing flavour!)
8. Ginger Garlic paste – 2 teaspoon (optional)
9. Bread Crumbs – to coat the kebabs (about ½ cup) [[ if you don’t have bread crumbs, you could use Semolina / Rava or even Cornflour ]]
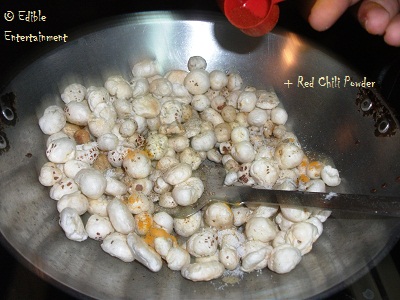
10. Red Chili Powder – 1 teaspoon
11. Chaat Masala or Garam Masala – 1 teaspoon
12. Oil – 1 teaspoon per kebab for shallow fry. (Alternatively, you can deep fry)
13. Tofu / Cottage Cheese (Paneer) - 50 grams [A suggestion by Vaishali that I loved & will surely use the next time I make these kebabs! :-)]


How to proceed -

I. To make the stuffing
1. Boil, peel & mash the potatoes. I boiled them in microwave. It just took 6 minutes! :-)
2. BLANCHING THE SPINACH – To blanch the spinach, you must –
    - Wash the spinach leaves well
    - Add them to water (enough to cover the leaves) and let it boil. (Takes about 5 minutes if the water isn't pre-heated)
    - As soon as the water comes to a boil, filter out the water & transfer the leaves to ice cold water for 1-2 minutes
3. In a mixer/grinder/food processor/blender, add the ginger paste, garlic, chilis, mint & coriander leaves.
4. Grind them to a coarse paste.
5. Then squeeze the water out of the spinach and add the blanched leaves to the blender.
6. Blend/Grind well for 1 minute to get a smooth paste. Then transfer to a mixing bowl.
 
7. Add the boiled potatoes & mix. If using tofu or cottage cheese (paneer), mash & mix in this step.
8. Then goes the salt, red chili powder, chaat masala (or any other spice you like). Mix well. Your mixture for the Kebab is now ready! :-)
To make the Kebab – (Style A)
1. Take some mixture in your hand & give it a round shape.
2. Gently press the ball vertically to flatten it into a disk shape
3. You can then coat the kebab with bread crumbs.
4. Heat 1 teaspoon oil on a pan & add the kebabs
5. Cook on medium flame. After about 3 minutes, flip to the other side & cook for another 3 minutes! Your kebab is ready! ☻
6. To plate up, take some hot rice on a plate, arrange the hot kebabs on the rice & serve it as a Sizzler! :D

To make the Kebab (of different shapes)– (Style B)
I’ve made the disk shaped kebabs/patties many a time! For Corn Kebab, Ragda Patties & even Veggie Burger! So I thought, why not make some other shape with the mixture! J And here is my attempt at making different shapes of Kebabs.
1. Make a flat disk shaped kebab. Use a knife to cut of the blunt edges & give it a rectangular shape. This is your Rectangle Kebab.
2. Alternatively, cut them into triangles.
3. Or even a somewhat vague flower! :P
4. Cook on both sides for 2-3 minutes each on medium flame.

  
5. Arrange on a platter & serve with tomato ketchup.


{P.S - I realised that I didn’t need the crumbs as my spinach-potato mix was thick enough. So, after the initial 2 kebabs, I just mixed 2 tablespoons of bread crumbs into the mixture & went ahead with making the kebabs. Didn’t need to coat them with the crumbs}
{ P.P.S - You have the freedom to experiment with the spices. If you don’t find one, you can always substitute it for the one you have or love. Ultimately, eating something you love is all that matters! }
{P.P.P.S – Feel free to use any kinda green leafy veggies }


I call these my Assorted Shapely Kebabs! ;-)

Friday 23 September 2011

Makhana // Foxnut


I'm sure you all must have read my post on Rujuta Diwekar's book: Don't Lose Your Mind Lose Your Weight. (Well, if you haven't - read that first!) I'm not getting into the principles of eating correctly here. But one of the principles in the book was to eat regularly (every 2 hours) and eat in small(er) quantities. So, what to eat every two hours?! Surely, we can't eat the same thing 8 times a day! That gets boring! We must keep in mind that the stuff we crunch every 2 hours must be nutrient-rich! And here's the perfect snack for you! Move over chips & popcorn -make way for the crunchiest, tastiest & of course - healthiest snack! :-D

Makhana // Foxnut // Gorgon Plant // Euryale Ferox : Different names. Multiple health benefits. Tasty. Are you paying attention yet? :-P This is a native Asian water plant and is mainly cultivated for its edible seeds. They look really beautiful! Almost like popcorn. The seeds (Makhana // Fox nut) can be eaten raw, cooked roasted or fried. In India, we roast it & add spices. It is much much better than popcorn! ☺ So, should I post the recipe here or talk about its goodness? I think I'll talk about its advantages a little bit more...
1. Ayurveda and Unani (branches of medicine) texts have accepted its aphrodisiac and spermatogenic properties.
2. Propped makhna cotains almost 12% of protein! (excellent especially for vegetarians!)
3. It reverses the aging process over a period of time
4. I also read somewhere that
it is used as a treatment for arthritis and rheumatic pains
5. It is in the waterlily family and is traditionally known as analgesic, aphrodisiac, astringent, deobstruent, oxytoxic, and tonic.
6. There are no side effects, nor drug interactions, to worry about when eating fox nut
7. And the last but not the least, I found out from a Google that fox nut has also been used to burn fat as part of a weight loss treatment!

So, what are you waiting for? Go get Makhana // Fox Nuts today!

Here's the recipe for propped Makhana (a healthy substitute for popcorn) We can do a lot more with it. But for now, I'm posting about this snack which is very quickly becoming my favorite thing to crunch!

You'll need -
Fox Nuts // Phool Makhana - 2 cups (or as many as you want to make)
Salt - as per taste (around 1/2 teaspoon)
Freshly ground pepper - 1/2 - 1 teaspoon
Red Chili Powder -  1 teaspoon (You can use any other flavored powder you want)

Turmeric / Haldi Powder - 1 teaspoon
Clarified butter // Ghee // Any cooking oil - 1-2 teaspoons (Don't freak! Clarified butter is actually good for you! Plus, you do need small amounts of fat to keep your system going!)
** You can actually use any spice you want & like. Just like how you experiment with popcorn flavors, do the same here!

 
Method -
1. Heat the Ghee/ Clarified butter / Oil in a deep bottomed pan.
2. Add the Makhana / Fox Nuts to it and mix.
3. Add salt, pepper, chili powder (or anything you want!) and mix well. (I added cumin & flax seeds too)
4. On medium flame toss everything together. Keep mixing it regularly so as to not burn the seeds.
5. Let it roast on low-medium flame until its gets crunchy. I usually takes around 6-10 minutes for them to get done fully! But then again, it all depends on the quantity.
6. Turn off the flame & let it cool. Store in air tight container and eat whenever you want! :)

* Note: I usually prepare this in advance for 1 or 2 days. I like it fresh. But you can prepare and store as much as you want.
** It is easily available in stores in Asia. Do some research work and locate a grocery store that will stock up Fox Nut / Phool Makhana for you. Or you can always order it off Amazon


Step-by-Step pictures :-


 1.
 2.
 3.
 4.
 5.
 6.
 7.
 8.
 9.

I am a huge fan of this snack now! It so sooooo crunchy & yummy! And FILLING! Do try it out!


[P.S: This is just a new format of posting I tried. Do let me know if this is good or the previous format of posting the pictures along with the recipe at every step was better]

Shaun T's Hip Hop Abs : Review

Its been a while since I posted about any workout video. I'm someone who gets bored with a routine very quickly. I need constant change. And so, after 2 weeks, I decided I needed something other than Callanetics and Tae-Bo Cardio. They were fun, no doubt about that. But I knew the routine so well that I didn't have to wait for video.
And so, as I set on a quest to find an interesting workout, I came across Shaun T's Hip Hop Abs. My uncle from the US gifted me lots of workout DVDs and this one was among them. I've always enjoyed dancing. In fact, I've been learning Indian Classical Dance for the past 14 years. And I love Hip Hop. So, I finally popped in the DVD and here is my take on the workout ...
I read somewhere - "leading a healthy and active lifestyle will help to promote both your inner and outer beauty". This, and the fact that I am quickly bored with even the most fun exercise videos out there inspired me to try out a new type of workout. I needed something exciting (obviously!), motivating and flexible with my schedule. I kid not when I say I have no time for myself! I have to wake up an hour early everyday to squeeze in my workout!!!! (something I conveniently forget on a lazy day!)

This is a set of 6 DVDs consisting of the following:-
♠ Introduction
♠ Ab Sculpt
♠ Fat Burning Cardio
♠ Hips, Buns and Thighs
♠ Total Body Burn
♠ 6 Minute Abs
You also get a step-by-step nutrition guide and 30-day workout calendar! [Although I don't intend on doing this for 30 days continuously {my god! Think of the monotonousness!} I think it is a great way for you guys to keep a track on your workout and the results.

Why you should buy this video-
- First of all, I LOVED Shaun T! He's damn cute!
- It doesn’t matter if you don’t know how to dance. Shaun T will teach you the basics until you’re capable of following all the other routines. So even if you have two left feet, you must try this simple video!
- With the Hip Hop Abs program, there’s no need to put up with boring sit-ups, crunches, etc. You're always gonna be doing "Tilt, Tuck & Tighten". And with the peppy beats. You just wont get bored!
- If you are a busy bee, definitely get this one! The maximum a video will go upto is 45 minutes. (there are 6, 20, 30 & 45 minutes videos. Just pick the one you feel like & get an amazing workout)
- If you love dance, then this is an absolute yes-yes! ;-)
- If getting just a slightly better looking stomach is your goal then check out this amazing program
[[ >> Click HERE to buy the workout program for a very reasonable price. ]]

Why you shouldn't get this video -
Umm.. well, its hard to come up with cons of a workout I love! But here are a few things you might consider before buying this program :
- It is NOT an intense workout program. You'll have fun but it is difficult to break a sweat from this workout!
- The music is not so good! I was looking for hip hop & all I got was slow pop music
- And honestly, I have a feeling this one is gonna get old pretty quickly.

I've been doing this one for the past 3 days. I am enjoying it, having fun and really letting my hair down! :-D But I'm not sure if this is challenging enough to melt the fat away......

Monday 19 September 2011

Vegetarian Chinese Noodles

Ladies & Gentlemen, I present to you the simplest Chinese Noodles you will ever come across! :-D My mom has been making this for my school lunch box since a very long time! I finally learned this one from her. Well, not so much as "learned" as I just heard what she does once. It is so easy and yes, damn tasty! It tastes really awesome with the Chinese Manchurian (but, I'll make that some other time! ) To get a more authentic Chinese dish, you have to use stuff like Spring Onions (didn't have it at home so I used normal onions), something called Ajino-Moto which brings out a real Chinese flavor (again, I skipped coz its not good for health. And since I am making it at home, why make it unhealthy?) You can also add a lot of your favorite veggies like baby corn, mushrooms etc. (use your common sense though. Just because you like lady-finger, you can't add that here, can you? ) This one is the most basic Chinese Noodles with minimum veggies....

Ingredients - (enough for 4 people)
Chinese Noodles - 200 grams (also called Hakka Noodles here)
Cooking Oil - 1-2 tablespoons (remember, we're eating healthy! :-D)
Soy Sauce - 2 tablespoons {a very important ingredient of the chinese cuisine. You can skip it, but then your noodles wont have the authentic chinese taste to it.}
White Vinegar - 1-2 teaspoon (another important, yet not totally necessary ingredient. Don't add too much of this. And use only plain vinegar)
Onion - 2 medium finely chopped (Preferably Spring Onions)
Carrots - 2 finely chopped or grated
Bell Pepper/ Capsicum - 1 medium finely chopped
Cabbage - 1/4th of a cabbage finely grated (add more if you like cabbage) {alternatively, you could use Iceberg Lettuce too}
Green Chili - 4 - 5 (I just sliced it length wise so that it would be easy to spot & remove it. You can finely chop it if you dare to eat the spice! :-P)
Salt - to taste (2 teaspoons)
Garlic Cloves - 2-3
Other ingredients you can use (I skipped) ---
Red Chili Sauce - 2 tablespoons
Chinese Sauce - to taste (around 1-2 teaspoons)
Baby Corn - 6-8 cut & washed
Egg
METHOD ---
STEP I. Boiling the Noodles- (You can follow the manufacturer's instructions on the cover)
1. Take the packet of 200 grams of noodles and drop it into a deep bottomed vessel full of water & 2-3 tablespoons of salt.
2. Boil it on the gas stove on high flame for at least 5-10 minutes or until you can see that the noodles are boiled. (just lift a few & press them to see if the are mashing)
 3. Switch off the flame & filter out the water. You can then immerse the noodles in cold water like we did in Pasta. This makes sure that the Noodles are separated & they don't break while mixing)
STEP II. Making the noodles -
1. Heat 2 tablespoons of oil in a deep bottomed pan. Then add the green chilies and sauté for 30 seconds.
2. Add the onions & fry for 1 minute. It turns slightly translucent. Then add the cabbage, capsicum/bell pepper & the carrot and mix it all well.
3. Now add the salt, vinegar and soy sauce & give it all a nice mix. Immediately add the noodles too.
 4. Chinese has a lot of raw veggies and so, you shouldn't let it cook for long. You have to be really quick. Mix the vegetables-mixture with a noodles really well. With practice, you'll be able to toss it and mix. ☺ Until then, be careful not to mash the noodles and make sure the veggies mix well with the noodles. That's it - your Chinese Noodles is ready!

STEP III: Plate UP!
So, enjoy your hot noodles with some Manchurian or just like that!
請享用。
which means, ENJOY!!! ☺ ☻  
Related Posts Plugin for WordPress, Blogger...